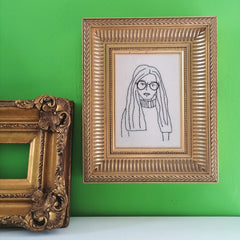
If you are looking for an alternative way to frame your embroidery hoop art rather than in the hoop this step by step guide will show you how.
Firstly, if you are reading this before you start your Fat Hen And Flo Embroidery Pattern here are a couple of things to consider. Will your finished embroidery fit into the aperture of the frame you are planning to use? If you haven't chosen a frame yet this is something to consider. If not you might need to resize your pattern template to fit.
Secondly, ensure the fabric you are using is at least 4cm bigger on all edges than your frame aperture. This may mean that you need a larger piece of fabric than stated in the pattern materials list.
Let's start by removing the back of the frame. Keep the backing board aside. Remove any other paper or artworks. I prefer to frame textile art without glass so at this point remove the glass too. Give the frame a quick clean to remove any dust or fluff.


Use the backing board as a template to cut out a piece of stiff craft board or cardboard. It it also a good idea to add some form of padding between the backing board and your textile art. I use quilting wadding. You can also use felt or an old wool blanket. Use your backing board again as template to cut out the size. Then fix your padding to your card with glue. I use a glue stick. Spray mount will also work. For any other types of glue I would recommend testing on a scrap of your padding fabric to make sure dark glue marks don't show through.


Now remove your embroidery from the hoop. Press on the reverse to remove creases. If the creases are stubborn use plenty of steam or lightly mist with water. Lay your embroidery on your padding/board centring the image. Cut off the excess fabric leaving a 3cm edge. I butt my ruler up to the backing board and trim off the excess. This gives a nice clean equal edge all around.


Turn your embroidery and padding/board over without moving the fabric. Pull each of the corners in a use a piece of tape to secure. I use acid free framing tape. Masking tape will do although doesn't always hold as firm.


Next fold in the top and bottom edge and tape in place. Very gently pull the fabric and you tape it down. You want to make the embroidery crease free without distorting it. Now tape the sides. Press the tape firmly in place to help it adhere. I like to sign, date and title the backboard at this point.


Turn the piece over and you should have a nicely centred, slightly padded, neat embroidery. If it is not quite right you can pull the tape off and reposition it.
Place your textile art into the frame.


Put the backing board in place and secure with the relevant frame fixings. Tape the back of your frame with acid free framers tape or masking tape.
Your embroidery is finished ready to display.


